

Cat Butt Valentine Banner – FREE PATTERN
I know I risk being known as The Cat Butt Lady with this project, but I just couldn’t resist…
Here’s the backstory.
I was in cat butt Christmas ornament production mode when I saw two of my cat pieces laying side by side on my table. The curls of the tails created kind of a heart shape and I was like, “Ohhhh noooo, now I have to make a cat butt Valentine project!” And so, I give you…
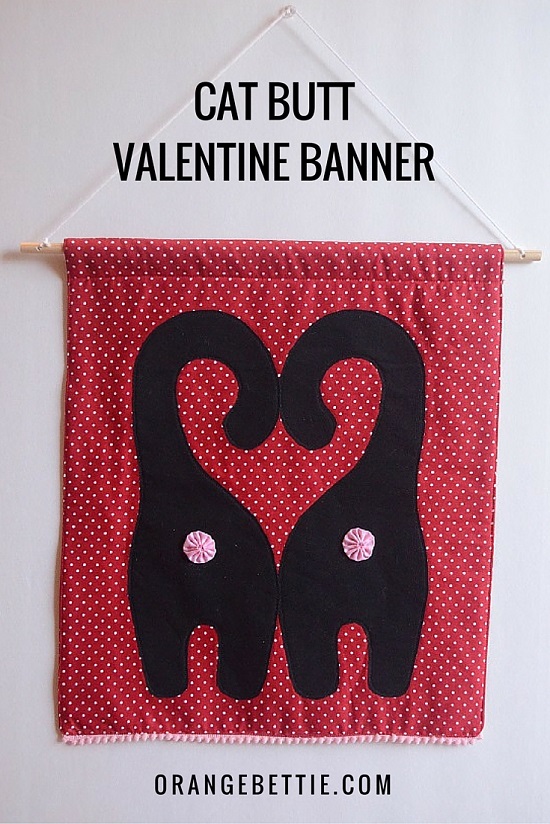
The Cat Butt Valentine Banner!!
Because we all know cats show their love by showing you their very fancy cat butts. And with 5 cats who love us most of the time, we see lots of cat butts in our house.
The pattern is a larger version of the cat butt Christmas ornament, but with a little reshaping at the tail to create the heart shape when the cats are placed side by side.
Materials
- Black fabric (or other fabric for the cat bodies) - enough to cut out 2 cats. Each cat is 6” x 14”, so a piece either 6” x 28” or 12” x 14” will be big enough to cut two.
- Fusible webbing - same amount as the black fabric
- Banner fabric – 2 pieces 16” wide x 20” tall
- Fusible fleece – 15” x 19”
- Pom pom trim for bottom edge (optional) – 20”
- Cat butts - 2 1” pink fabric yo yos or felt circles. Here is a tutorial showing how to make one using the Clover yoyo maker. I used the 30mm size yoyo maker (the green one) for this project. And here is a tutorial showing how to make one without the special yoyo maker.
- ½” diameter wooden dowel – 17 ¾” long
- Yarn or twine to hang the banner
- Free pattern
Let's Make It!
- Fuse the fusible webbing to the back of the black fabric. Cut out 2 cats, mirror images of each other. Don’t cut the circle out for the cat butt. That’s just a placement guide.
- Fuse the fusible fleece to the back of one of your banner pieces. This piece will be the banner front.

- Position the cats on the banner front and fuse down. Keep in mind that there will be 1 ½” folded back at the top to make the casing.

- Top stitch around the cats, reducing your stitch length as you go around the tight curves.
- (Optional) Baste pom pom trim across the bottom of your banner front, with the pom poms facing the top of the banner and the top of the tape hitting just at ½” above the bottom of the fabric.

I used mini pom pom trim, which had a very narrow tape that was hard to hold or pin in place while I basted it down. I ended up gluing it in place before I basted it down with my machine. - Layer the banner back over the banner front, right sides together. Sew around all edges with ½” seam allowance, leaving a hole at the top to turn.

- Trim your corners.

- Turn the banner right side out and press. Top stitch around the edges of the banner.

- Turn 1 ½” of the top edge to the back. Stitch along the edge of the folded piece to create a casing.

- Glue the yo yos to the cat butts using the pattern as a placement guide.

- Drill holes at either end of your dowel, or use a knife to carve notches in either end.
- Thread the dowel through the casing. Tie a length of yarn to the ends to hang.
Now go hang your cat butt Valentine banner on your front door to show the world what a crazy cat person you are!

3 comments
Comments are closed.
pretty please tell me that every month we will get a new cat butts craft. It's a series that needs to be done!