
Button Heart Valentine Pillow Wrap – Sewing Tutorial
Use my tutorial to sew a beautiful Valentine pillow wrap with a button heart design! Old buttons and a velvet heart applique give it a vintage look that’s perfect for Valentine’s Day.
This post contains affiliate links. If you purchase something through one of those links, you won’t pay a penny more, but I’ll earn a small commission which will help me keep bringing great content to you. Thanks!
I’ve got another seasonal pillow wrap design to share with you today! This one is for Valentine’s Day, and I gotta say… I think I’m in love.
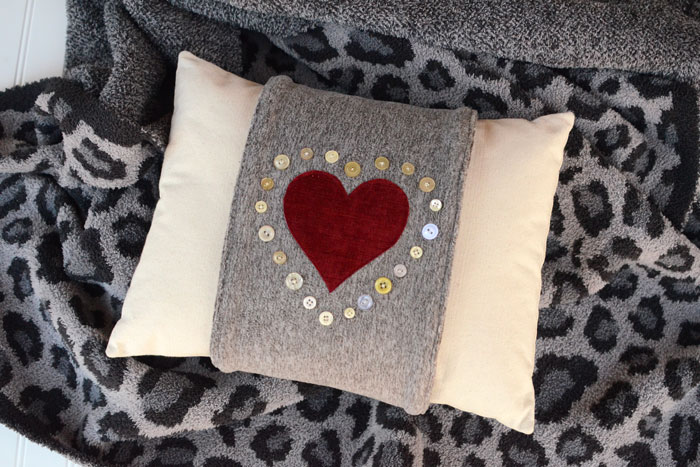
It’s a fluffy fleece pillow wrap accented with old buttons and a velvet heart applique. It’s a simple design, but the mix of textures makes it wonderful. So soft, so warm looking! And the velvet heart and old buttons give it a lovely vintage feel.
I’ve got a tutorial for you below.

Because it’s a pillow wrap, it’s easy to switch out the design when the season changes. Just take off one wrap and replace it with another! And the wraps store much more compactly than full pillows so they’re a real space saver too.

To make the base pillow, see my tutorial for making a pumpkin pillow wrap. That was the first post in this series. And for a fun Christmas design, see my snowman pillow wrap tutorial.
Did I mention I made the whole thing from what I had in my stash? BONUS!

The fluffy mushroom brown fleece is some fleece I bought for another project (and never used). The heart is made from a velvet upholstery fabric sample. And all those buttons came from my button jar!

If you don’t want to use fleece, you can easily use a quilting weight or home dec weight fabric for your Valentine pillow instead.
Supplies for the Button Heart Valentine Pillow Wrap
Wrap –2 pieces, 9” wide x 28” long from quilting cotton, home dec fabric, or fleece
Lightweight fusible interfacing – 1 piece 8.5” wide x 27.5” long *Not necessary if you are using fleece for your Wrap.*
Hook and loop tape –1 piece, 8” long
Heart Applique– scrap red fabric. I used a low pile velvet upholstery fabric for a lush texture.
20-24 white/pearl buttons in a variety of shapes and sizes (Raid your button jar!)
Free Pattern – Button Heart Valentine Pillow Wrap

All seam allowances 1/2" unless otherwise noted. RST = Right Sides Together
Prep Your Pieces
Trace the Heart Applique on to the paper backing of the fusible webbing. (The pattern is already symmetrical so there’s no need to reverse it.)
Follow manufacturer’s instructions to fuse the webbing to the back of the Heart Applique fabric.
Follow manufacturer’s instructions to fuse the interfacing to the back of one of your Wrap pieces. This will be the Wrap Front. (The piece without the interfacing will be the Wrap Lining.) If you’re using fleece for the Wrap pieces, you can skip this step.
Create the Button Heart Design
Remove the paper backing from the Heart Applique, then center it vertically and horizontally on the Wrap Front.
Follow manufacturer’s instructions to fuse the Heart Applique down to the Wrap Front.

Top stitch around the Heart Applique close to the edge to secure.
Arrange the buttons around the Heart Applique to create an outline. I placed my buttons roughly ½” – ¾” out from the heart.

Use the Fabric Fuse Liquid Adhesive to glue the buttons down.
When the glue is dry, go back and hand sew each of the buttons in order to secure. (And also to add a nice finishing detail.)
Sew the Pillow Wrap
Place the Wrap Front and Wrap Lining pieces RST (right sides together). Stitch around all 4 sides with a ¼” seam allowance, but leaving 3.5” open along one of the short ends to turn it right side out.

If you used fleece for your Wrap pieces, grade your seam allowances to reduce bulk. To grade the seam allowance, trim one seam allowance to ¼” but leave the other one a full ½”.
Clip corners. Turn right side out, then give it a good press. When you get to the turning hole, press the raw edges to the inside in order to create a smooth edge.
Top stitch around all 4 sides with 1/8” seam allowance. This will close the turning hole.

Now for the hook and loop tape. Sew the “hook” side (that’s the scratchy side) of the tape across the top of the Wrap Lining (the back of the wrap), centered horizontally and about ½” from the top edge. Stitch around all 4 sides of the hook tape so it’s good and secure.

The last thing to do is sew the “loop” side (that’s the soft, fuzzy side) of the tape to the bottom of the Wrap Front.
You’ll need to place the Wrap around the Pillow so you can see how far up from the bottom it needs to be in order to connect with the hook tape.
I placed my loop tape right at the bottom of the wrap, but that’s because I used a bulky fleece that required a longer length to wrap around the pillow. For a home dec weight fabric, your loop tape will probably be about 1.5” from the bottom of the wrap.
As before, stitch around all 4 sides of the tape to secure it.

Your button heart pillow wrap is finished! I hope you LOVE your Valentine pillow wrap as much as I love mine!
