Fleece Frankenstein Halloween Pillow - Free Sewing Pattern
This post originally appeared on Bombshell Bling.
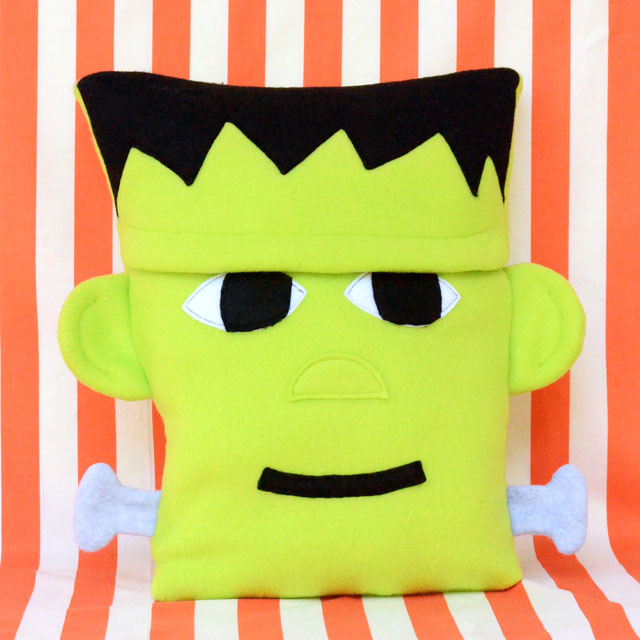
This Frankenstein Halloween pillow is the PERFECT decor for Halloween! Such a cute, bold statement piece, but made with soft, cuddly fleece.
Aside from black cats, Frankenstein is probably my favorite Halloween character. Maybe because he was someone’s DIY project. Ha! Seriously, though. Some people might think he looks scary, but that’s just ‘cause he was put together out of odds and ends that don’t quite fit. And I think that kind of describes all of us, don’t you think? Underneath that misunderstood exterior, he’s really just a friendly goofy guy.

This soft fleece Frankenstein pillow definitely shows off his fun, goofy side. Soft and squishy, he’s also nice for kids to snuggle.

This Frankenstein pillow is quick and easy to sew up. You can it start to finish in less than an evening! I’ve got a free pattern and a tutorial for you below.

Materials
Green fleece – ½ yard
Black fleece – ¼ yard
Gray fleece – scraps
White felt – scraps
Bag of polyester stuffing
All seam allowances ½”, unless otherwise stated. RST = right sides together
Make the forehead
Place Forehead pieces RST. Sew together along curved edge.

Clip curves, turn right side out.
To create the forehead wrinkle, top stitch 1” from curved edge starting and stopping 1” from ends.

Place the Hair piece across the top of the Forehead. Top stitch along zig zag (hairline) side close to the edge. Baste the other three sides to secure.

Make the ears
Sew 2 ear pieces RST around curved edges. Leave straight side open.

Trim seams. Clip curves, turn right side out.
To create the ear ridge, top stitch ½” from curved edge, starting and stopping 1” from ends.

Repeat with remaining 2 Ear pieces.
Make the bolts
Sew 2 bolt pieces RST around the sides and curve, leaving the straight end open.

Trim seams. Clip curves, turn right side out.

Repeat with remaining 2 Bolt pieces.
Make the eyes
Place the Eye Iris pieces over the Eye pieces so the edges line up. The Eye Iris will be slightly off center, creating a side-eye effect.
Top stitch the Eye Iris down to the Eye around all 4 sides close to the edges.

Assemble the pillow
Okay, now that you’ve prepped all of Mr. Frankenstein’s parts and pieces, it’s time to assemble the pillow!
Stitch the Eyes, Nose, and Mouth down to one of the Face pieces. When the face is complete, the Forehead should overlap the top of the eyes slightly. Keep that in mind when placing the eyes. You can check the placement by simply laying the Forehead piece on top and checking to see if it overlaps the way you like.

Place the Forehead piece across the top of the Face piece. Baste in place at the sides and top, ¼” from the edge.

Place the Ears on either side of the Face even with the tops of the Eyes, RST and with raw edges touching. The Ears will be pointed toward the center of the Face. Baste in place ¼” from the edge.

Place the Bolts on either side of the Face, roughly 1” from the bottom, RST and with raw edges touching. The Bolts will be pointed toward the center of the Face. Baste in place ¼” from the edge.

Place the pillow back (the second Face piece) on top of the Face piece you’ve been working with. Sew around all 4 sides, leaving 3-4” at the bottom to turn.

Clip corners. Grade seam allowances as necessary. Turn right side out.

Stuff the Frankenstein pillow and use a ladder stitch to close the turning hole.
You’re done!


