
Sudsy Bunny DIY Soap Pouch - Free Sewing Pattern
This Sudsy Bunny soap saver makes bathtime fun! Use my free sewing pattern to sew this adorable DIY soap pouch with bunny ears.
This post originally appeared on Bombshell Bling.
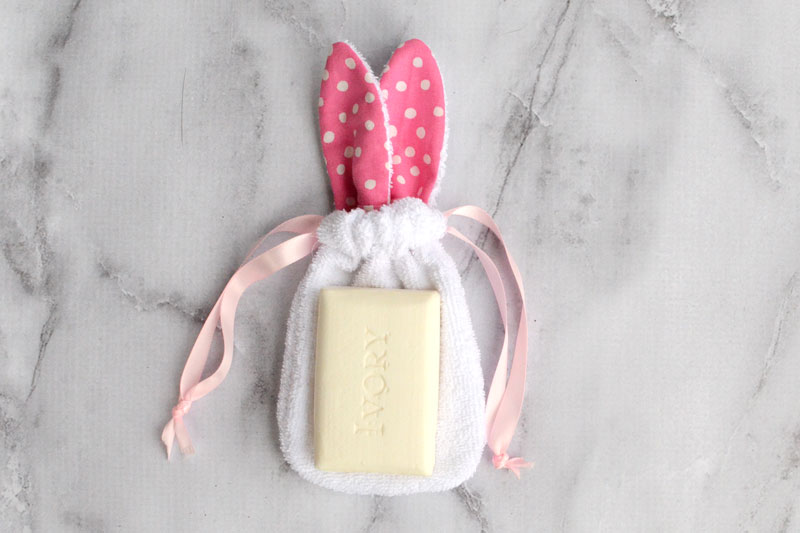
Sew a bunny soap pouch that’s perfect for Easter baskets – and also can be used all year! The little soap holder with bunny ears makes bathtime fun while also cutting down on the mess around the tub. Just slip a bar of soap into the drawstring pouch and you’ve got a fun bathtime accessory!
I’ve got a free pattern for my Sudsy Bunny DIY Soap Pouch below.

Bathtime is made more fun for kids (and less hassle for their parents) when they’ve got cute bath toys! But this little bath toy also helps them wash up. The terry cloth lathers up nicely and won’t slip out of your hands like a bar of soap does. And you can use the drawstrings to hang it from a faucet handle or hook so the wet soap doesn’t make a mess on the side of the tub.

And of course, since it has those bunny ears it’s also a fun little surprise to add to an Easter basket! I don’t know about you but I get tired of all the plastic trinket-y toys we give our kids at holidays that end up immediately broken or cluttering up the house.
For other cute Easter basket projects, check out my free pattern for fabric Easter eggs or a reversible chick and egg softie.

The DIY soap pouch is fast and easy to make, which is nice if you want to make multiples! The only special material you need is terry cloth. You can usually find it at the fabric store, but if you can’t you can also just use a hand towel.
Supplies
¼ yard terry cloth, or a hand towel
Accent fabric – scraps quilting cotton
Drawstring – 1 yard ribbon or cord, ½” wide or narrower.

RST = Right Sides Together
Prep your pieces
On the Pouch pieces, make ½” long snips on the sides, where indicated on the pattern (black circles).

Sew the ears
To make the ears, place one terry cloth Ear piece and one accent fabric Ear piece RST. Sew around sides and top with ½” seam allowance. Leave the bottom open.
Repeat with the remaining terry cloth and accent fabric Ear pieces.

Clip curves and turn the Ears right side out. Your Ears will have accent fabric on the front and terry cloth on the back.

Center both of the Ear pieces across the top one of the Pouch pieces, RST and with raw edges touching. The accent fabric side of the Ears should be face down. Baste in place with ¼” seam allowance.

Assemble the soap pouch
Sew the Casing pieces across the top of the Pouch pieces, RST with a ½”seam allowance. (On the Pouch piece with the Ears basted on, the Casing will be on top of the Ears.)

Press the seam open.
Turn the Pouch pieces over so the wrong side is up. Press the edges in ½”, starting at the slits cut on the sides and going up to the top. Do this for all 4 slits.

Stitch the folded bits in place, close to the edge.

Press the raw edge of the Casing ¼” to the wrong side.

Fold the Casing to the back of the Pouch, then press.
Sew the Casing down close to the edge.

Place the two Pouch pieces RST. Sew together around sides and bottom with ½” seam allowance.

Clip curves and then turn right side out.

Thread the drawstrings
Cut the ribbon into two 16” – 18” lengths.
Thread one of the ribbons through one casing and then back through the other. Knot the ends.

Repeat with the second ribbon, this time starting on the opposite side of the pouch. Knot the ends.

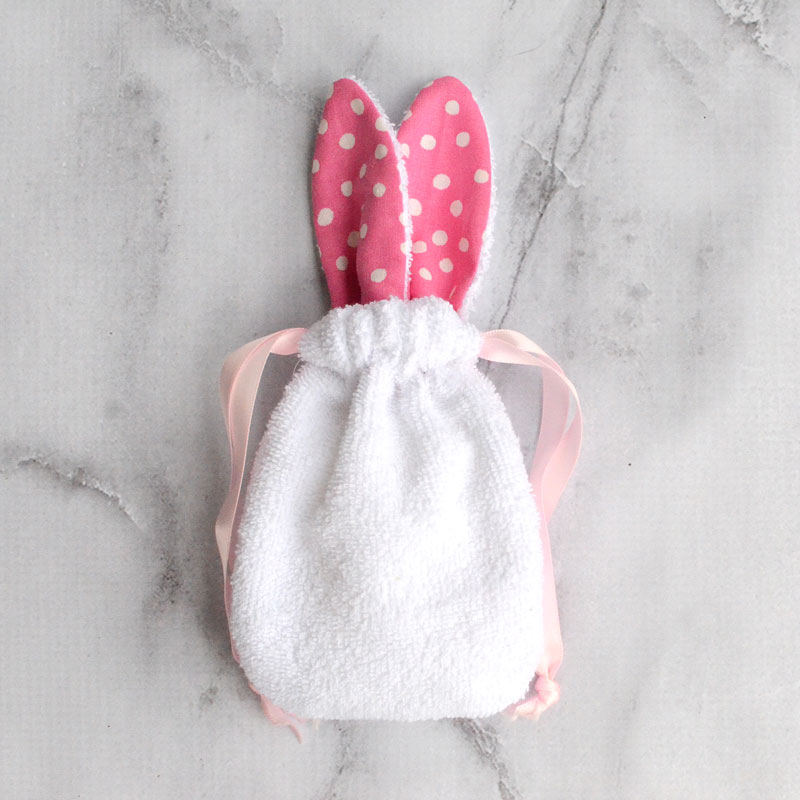
Your Sudsy Bunny DIY Soap Pouch is finished! See how cute he is!!
