
Fabric Lanyard with ID Badge Holder – Tutorial
See how to sew a DIY fabric lanyard with badge holder that’s great for back-to-school!
This post originally appeared on Bombshell Bling.
This post contains affiliate links. If you purchase something through one of those links, you won’t pay a penny more, but I’ll earn a small commission which will help me keep bringing great content to you. Thanks!
This fabric lanyard and badge holder would make a great back-to-school gift for a teacher! I’ve got a tutorial and free pattern for you below.
And while I created this project with back-to-school time in mind, you don’t have to be a teacher (or student) to appreciate it. Most workplaces require you wear an ID these days, and it’ always nice to freshen up your lanyard. I’m not gonna lie and say my own lanyard doesn’t get grungy over time.
Luckily, it’s easy enough to make a new one!
Looking for more back-to-school projects? I've got some great back-to-school sewing ideas for you here.
I’ve divided the tutorial into separate sections for the lanyard and the badge holder. That way if you want to make just one of the pieces, it’s easy to see which supplies you’d need. If you want to make both the lanyard and the badge holder, these are all the supplies you’d need to pick up at the fabric store:
- 1/4 to 1/2 yard fabric (You’ll need the full width of fabric, so you can’t use a fat quarter. For non-directional fabrics, you can use just 1/4 yard but for directional fabrics you may need 1/2 yard to get all the pieces cut with the print facing the right direction.)
- 1” swivel hook
- Pellon Peltex Two Sided Extra Firm Stabilizer – ¼ yard (or large scraps)
- Clear vinyl – scrap
- 20mm split ring
- Glue stick
Let’s get started!
Fabric Lanyard
Fabric lanyards are super easy to make – and quick, too! You can make one in 15 minutes!
Supplies:
Quilting cotton – I piece, 3.75” x approx. 44”
Make the strap
Press the strip of fabric in half lengthwise and with WRONG sides together.

Press the sides in to the middle.

Then, press the whole thing in half along the middle crease.

Sew down both sides of the strip 1/8” from the edge. Now you have a long fabric strap!

Thread a swivel hook on to the strap.

With the swivel hook still on the strap, and making sure not to twist the strap, bring the ends together (one end on top of the other). Sew across the ends with a ¼” seam allowance. Sew back and forth several times so it’s good and secure.
I like to slip the lanyard on before I sew the ends together to make sure the strap doesn’t twist when it’s hanging around my neck.

Slide the swivel hook down to the seam. This is the bottom of your lanyard.

Turn the strap inside out so the raw edges of the seam are now on the inside.

With the swivel hook still down at the seam, sew across the strap roughly ½” from the bottom.

Your fabric lanyard is done!
Badge Holder
The badge holder isn’t hard at all to make, but the assembly is probably a little different than what you’d expect. But when it all comes together, it’ll feel like magic.
Supplies
Quilting cotton – large scraps
Pellon Peltex Two Sided Extra Firm Stabilizer – ¼ yard (or large scraps)
Clear vinyl – scrap
Glue stick
Free pattern – DIY Badge Holder
Make the Tab
Press the Tab fabric in half WRONG sides together.
Then press the ends to the center.
Press in half along the crease, then sew down both sides with a 1/8” seam allowance.
Make the badge holder front
Center the Frame Interfacing on the back of the Front Frame fabric. Glue baste in place but DO NOT FUSE YET. You need to do a few more steps before you fuse it.
Make diagonal slits from the inside corners of the hole in the center of the Front Frame to the inside corners of the interfacing.
Fold the fabric inside the hole over the edges of the interfacing. Glue in place but DO NOT FUSE YET. (I missed taking a photo of this step, but you can see it in the photo for the next step.)
Now, fold the outer corners of the Front Frame diagonally over the outer corners of the interfacing. Glue in place. DO NOT FUSE YET.
Then, fold the long straight outer sides of the Font Frame over the outer sides of the interfacing. Glue in place but DON’T FUSE QUITE YET….
First, cover with a pressing cloth THEN follow manufacturer’s instructions to fuse the interfacing to the fabric.
Don’t skip the pressing cloth. There are small spots where the interfacing is exposed (not covered with fabric) which will make a big mess on your iron!
Center the Vinyl Window behind the hole in the Front Frame. Clip in place.
Sew around the hole with a 1/8” seam allowance.
I find it’s easiest to sew with the Fabric Frame face up (and the vinyl underneath). That way the presser foot doesn’t touch the vinyl and cause skipped stitches.
Sew across the top of the Fabric Frame with 1/8” seam allowance. Don’t sew the other edges – you’ll do that in a later step.
Make the badge holder back
Glue the Back Interfacing to the WRONG side of the Back fabric, 3/8” from the top and centered horizontally. DO NOT FUSE YET.
Fold the top corners of the Back fabric diagonally over the corners of the Back Interfacing. Glue in place, but DON’T FUSE.
Fold the top edge of the Back fabric down over the Back Interfacing. Glue in place. DO NOT FUSE YET.
Thread the split ring on to the Tab. Fold the ends of the Tab together to make a loop.
Place the Tab on the top (folded) edge of the badge holder back, centered horizontally and with 3/8” seam allowance. The top of the Tab should be facing away from the badge holder back. Sew in place with ¼” seam allowance.
Now, fold the raw edges at the bottom of the sides over to be even with the edges you folded over the Back Interfacing. Glue in place.
I don’t know if you can see this in my photo, but I folded the bottom part over just a hair more than what I folded over at the top. I did this on purpose so I’d have cleaner edges on the finished badge holder.
Fold the entire bottom half of the Back up over the Back Interfacing, tucking in about 3/8” at the top to create a smooth edge. Glue in place, THEN fuse everything down.
Sew across the top of the badge holder back close to the folded edge to secure.
Assemble the badge holder
Place the completed front on top of the completed back, WRONG sides together. Clip in place.
Sew around the sides and bottom with 1/8” seam allowance, leaving the top open and backstitching at the beginning and end of your seam.
Your badge holder is complete!
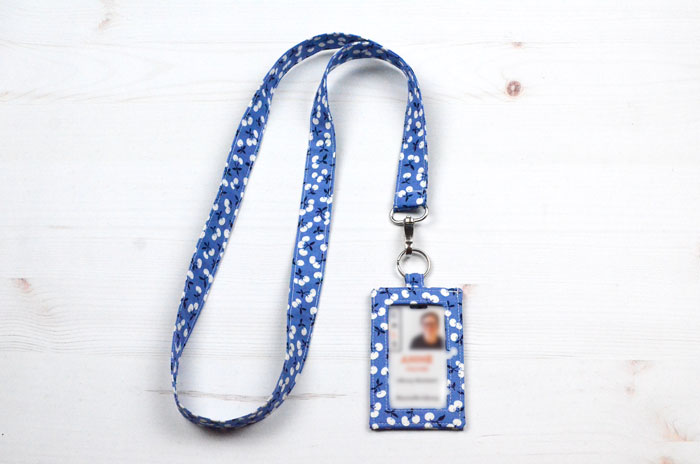
Put your badge holder on your fabric lanyard and you've got a complete set.