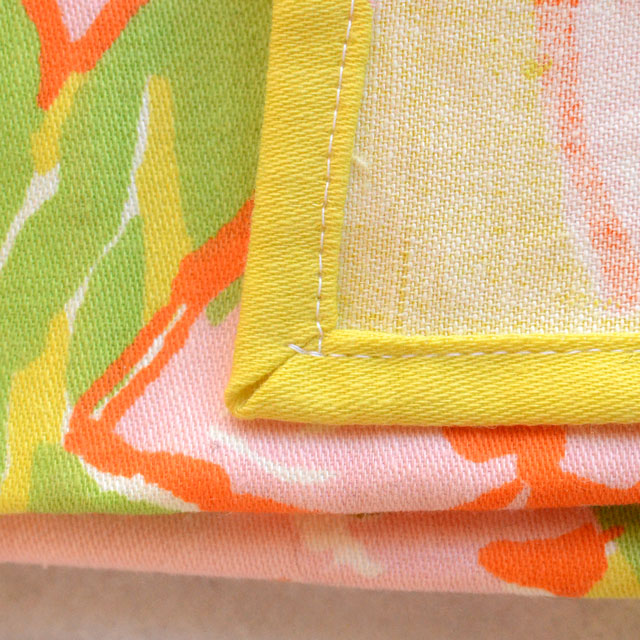
Mitered Corners on a Double Fold Hem - Sewing Tutorial
See how to sew mitered corners with this easy tutorial!
When a double fold hem goes around a corner (like on a fabric napkin or tea towel) the corners can get bulky. All those layers!! A mitered corner eliminates the bulk and makes a nice clean finish for the corner.
Plus it’s easy to do, if you know how.
I used this technique on a tea towel I made just the other day.
Rather than starting with a plain purchased towel, I created a towel from home dec weight cotton.
Even though the hem is on the back of the towel, I wanted the corners to look nice and crisp. I believe paying attention to the details makes a big difference in the overall look of a finished project.
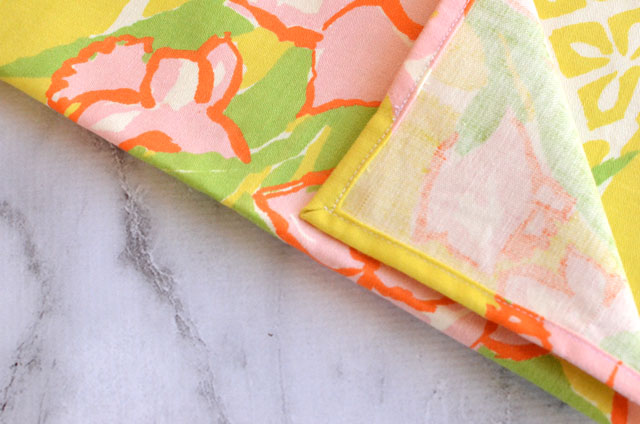
See how pretty that corner is on the back?
As I was writing the tutorial for the tea towel, I realized that it might be better to have the mitered corner instructions separate from the instructions for the rest of the tea towel. After all, there are tons of projects where you might need a mitered corner on a double hem, and you might not necessarily think of going to a tea towel tutorial to find the instructions for that.
There are actually several ways to create mitered corners on a double fold hem. I’m going to show you what I consider to be the easiest. It’s just a simple snip and a few folds.
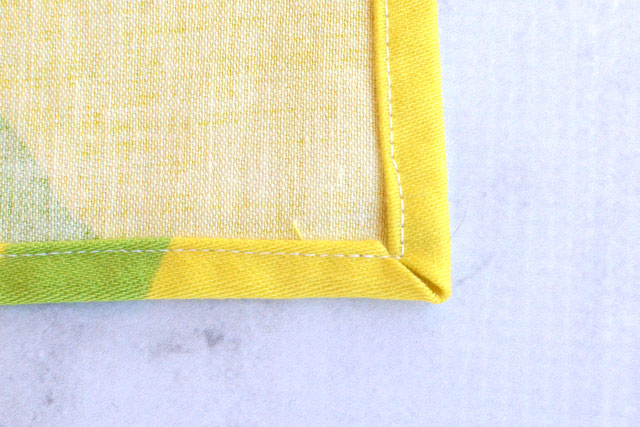
How to create mitered corners on a double fold hem:
Press a double fold hem around all edges of your fabric. To do this, first press ¼” - ½” to the wrong side of the fabric.

Then, press the same amount of fabric the wrong side again, enclosing the raw edge of the fabric into the fold.
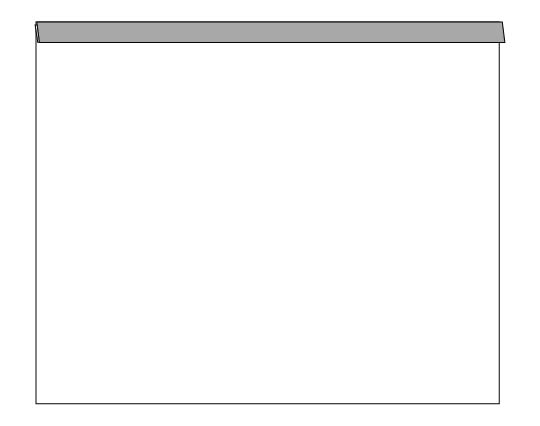
When you get to a corner where the hems will overlap, just unfold the hem on the one side while you press the hem on the other.
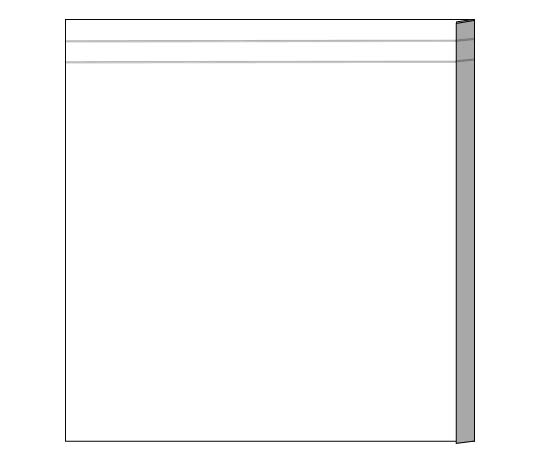
(For simplicity’s sake, my diagrams are just showing creases down two of the edges. If you’re hemming all four sides of a piece of fabric, like for a napkin, you’d have creases on all four sides.)
Now that you’ve got your double fold hem pressed in, let’s miter those corners.
Open out the double fold hem at one of the corners. You’ll see two sets of creases intersecting at the corner. The intersecting lines make 4 squares.
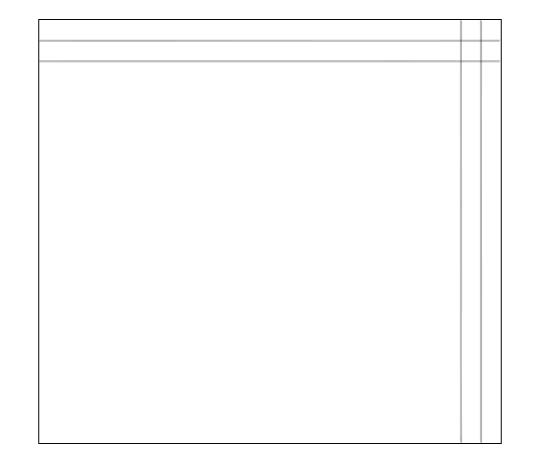
Cut off the corner at the tip of the first square, as shown below.
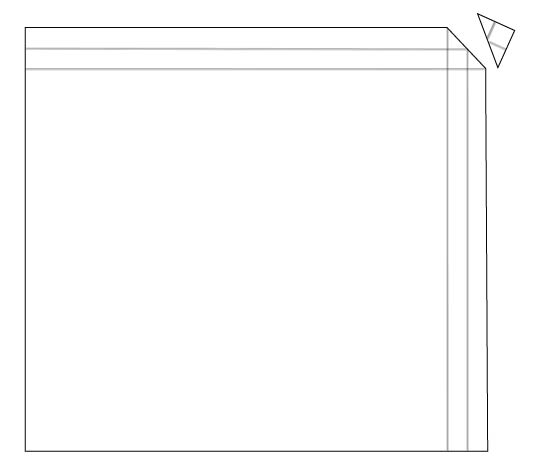
Fold the cut edge over at the tip of the remaining square.
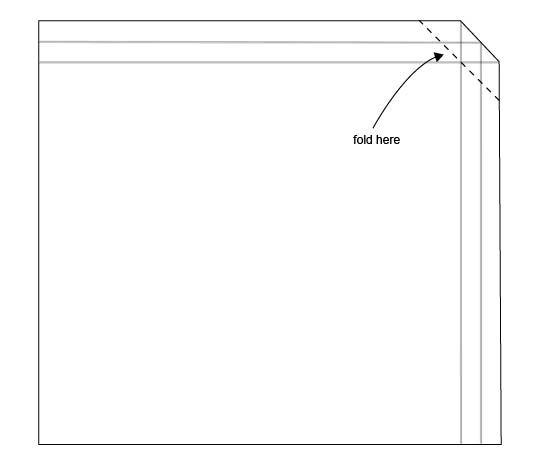
Now, fold the long edges over on their original creases. Fold the raw edge over, and then over again.
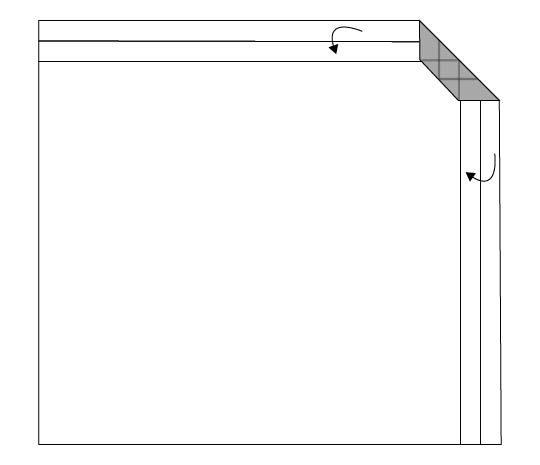
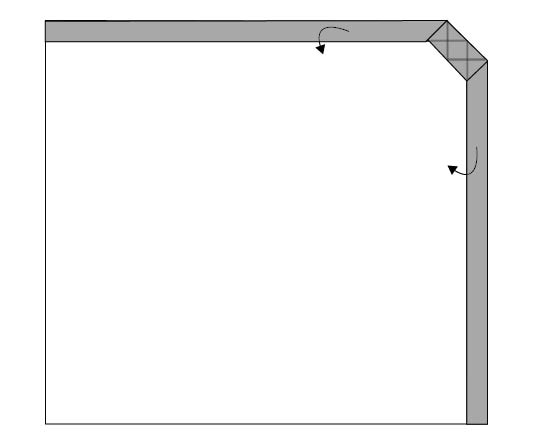
When you fold that second edge in, you’ll see that there’s a neat little diagonal line at the corner, with all raw edges turned under. Pin in place with a pin or fabric clip.
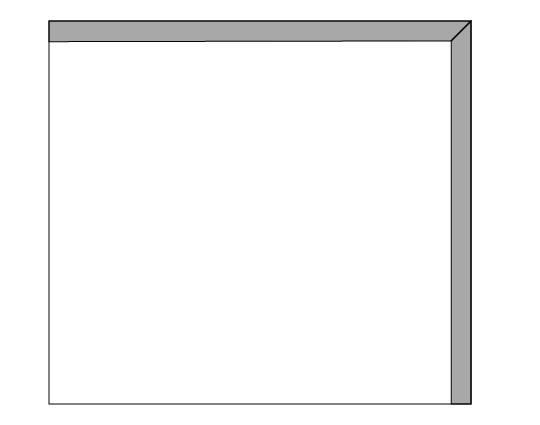
Repeat for the remaining corners.
And there you have it. Pretty mitered corners on a double fold hem – quick and easy!!

3 comments
Comments are closed.

These diagrams are really helpful. Thank you!