

DIY Halloween Black Cat Banner - Free Sewing Pattern
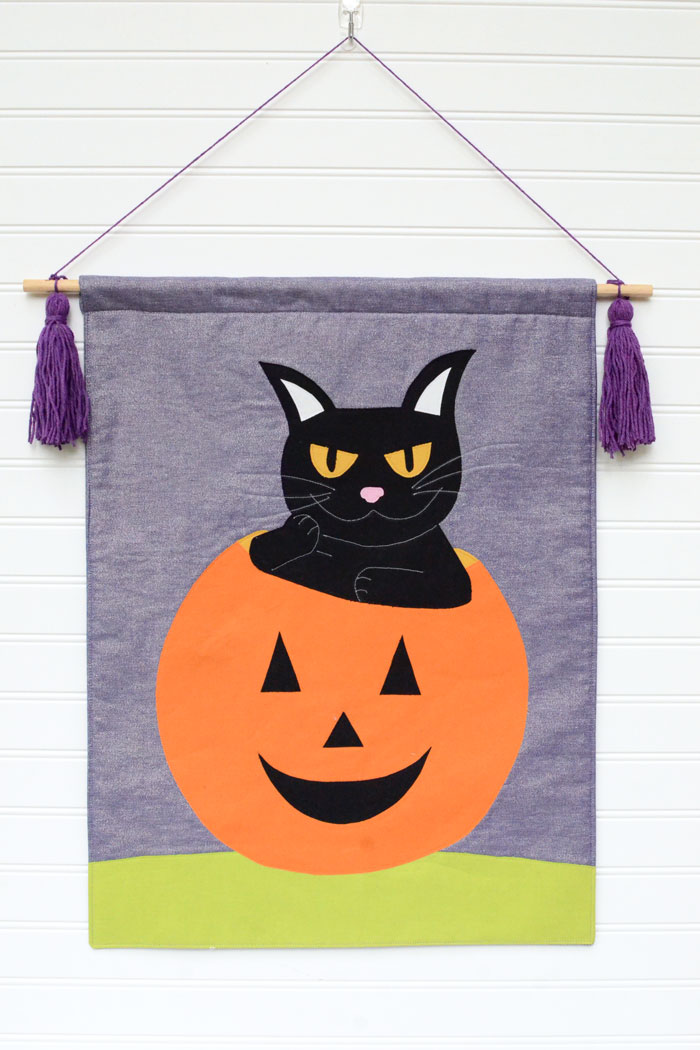
Create an adorable black cat banner for Halloween featuring a mischievous cat in a pumpkin! Use my free sewing pattern to create this fun DIY Halloween banner.
This post contains affiliate links. If you purchase something through one of those links, you won’t pay a penny more, but I’ll earn a small commission which will help me keep bringing great content to you. Thanks!
This post originally appeared on Bombshell Bling.
With 5 black cats at our house, you can probably guess the theme of all our Halloween decorations. Every year, we pull out the inflatable black cats and put them out in our yard. We place knick knacks of black cats around our porch. And we hang a black cat banner on our front door.
Several years ago I made a black cat banner that featured all 5 of our fur babies. (See it and get the free pattern here.) But after several years of it hanging on our door, I decided it was time for a new kitty banner. And this time, instead of 5 kitties in one banner, there’s just one kitty with a very big personality.

Look at that mischievous grin!! He’s clearly up to no good!

Definitely some Halloween trickery up his sleeve, don’t you think?
I’ve got a free pattern for you below.
But before I give you the pattern and tutorial, I’m going to brag on my daughter for a minute. She drew that kitty for me! She is a talented young artist, so when I had the idea of making a kitty and a pumpkin I asked her to draw it for me. (Actually, I paid her to draw it for me. Teenagers, ha!) 10 minutes later she comes back with a sketch of that smirky little kitty and I was in love.
Isn't she talented? Here's another awesome kitty design she drew for me.

So now we have a cute new black cat banner to hang on our door this year. And I’m sharing the pattern so you can have one, too.

It’s mostly made from quilting weight cotton solids, though you could use a patterned fabric for the background. My background is a purple with some metallic gold threads woven in so it’s all Halloween-y.
The sewing is all pretty simple, though topstitching some of the pieces does involve some tight curves. I used matching thread on all of the topstitching so if it wasn’t super straight it really wouldn’t be noticeable. I also hand cranked the machine on the tightest of curves.
While I used matching threads on the topstitching, I used a gray thread to stitch out the details on the kitty’s paws and face so those lines would stand out.
How to sew the Halloween black cat banner
Materials:
Background – 1 piece, 19” x 26” quilting cotton
Lining – 1 piece, 19” x 26” quilting cotton
Fusible fleece – 1 piece, 18” x 25”
Quilting weight cotton solids
Orange– ½ yard or fat quarter
Black– ½ yard or fat quarter
Green– ¼ yard or fat quarter
Golden yellow – ¼ yard or fat quarter
White – scraps
Pink – scraps
Fusible webbing – 1 yard
½” wood dowel, cut to 21.5” long
Yarn
You will also matching thread for each of the colors in the banner, plus gray thread for stitching the detail lines on the cat’s body.
Tips for Using the Placement & Stitching Guide
This pattern includes a Placement & Stitching Guide to help you get all your pieces placed exactly right. If you’re good at eyeballing things, you can just look at the guide and recreate the placement and stitching on your banner. But if you’re like me and not so good at eyeballing things, here are some tips to help you us the guide to get the placement and stitching just right:
- For placing large pieces, try cutting the background away. That will give you the outlines of all the main shapes that you can use to line your pieces up.
- For placing small pieces, like the eyes and noses on the cat and jack o’ lantern, try cutting those pieces OUT of the placement guide to create kind of a “stencil”. Then you can lay the guide directly on the banner and place your fabric pieces through the holes of the “stencil”. Carefully remove the guide without disturbing the fabric pieces, and you’ll have perfect placement.
- To mark the stitch lines, first cut the guide on the stitch lines. Put the guide down on the banner, then place a fabric marking pencil through the slits you cut to mark the lines on your fabric.
Prep your pieces
Trace all of the pattern shapes on to the back of your fusible webbing. The shapes are already reversed for you.
One thing I like to do when tracing pieces that will be cut out from different colors of fabric is write on each shape which color it should be cut from. Then, when I’m done tracing all the shapes I can easily see which shape should be fused to which color.
Grass – green
Jack O’ Lantern – orange
Jack O’ Lantern Rim – golden yellow
Jack O’ Lantern Ears, Nose, and Mouth – black
Cat – black
Cat eyes – golden yellow
Cat irises – black
Nose- pink
Ears- white
Follow manufacturer’s instructions to fuse each shape to the back of the fabrics. Cut out each shape.
Follow manufacturer’s instructions to fuse the fusible fleece to the back of the banner background.

Drill holes or cut notches at either end of the dowel.
Build the Jack O’ Lantern
Place Grass across bottom of Background piece. Fuse, then top stitch close to the edge to secure.

Place Jack O’ Lantern piece on the Grass. DON’T FUSE YET. This piece is not symmetrical. Use the grainline marking on the pattern and the Placement & Stitching Guide in order to place it at the correct angle.
Now that the Jack O’Lantern piece is placed, layer the Jack O’ Lantern Rim piece across the top of the pumpkin. There will be a 1/8” overlap between the two pieces. The Jack O’ Lantern Rim piece should be tucked under the Jack O’ Lantern piece at the overlap.
Fuse both pieces, then top stitch them down.

Place the Jack O’ Lantern Eyes, Nose, and Mouth. Fuse them down, then topstitch.

Build the Cat
Place the Cat so he is coming out of the Jack O’ Lantern. Fuse, then top stitch.

Place the Paw. Fuse, then topstitch close to the edge to secure. Don’t worry about stitching the details right now. We’ll go back and do that at the end.

Place the Ears. Fuse, then topstitch.

Place the Eyes. Fuse, then topstitch.

Place the Irises on the Eyes. Fuse, then topstitch.

Place the Nose. Fuse, then topstitch. The curves here are pretty tight so I ended up hand cranking every stitch to make it around. Luckily, it’s a really small piece!

Use the Placement & Stitching Guide to mark the detail stitch lines with a fabric pencil. Stitch the lines in gray thread so they show up on the cat body.

Assemble the Banner
Place the Lining on top of the Background, right sides together. Stitch around all 4 sides with a ½” seam allowance, leaving 4” open at the top to turn.

Clip corners. Turn right side out and then give it a good press. Press the raw edges at the opening to the inside.
Top stitch around all sides close to the edge. The top stitching will sew the turning hole closed.

Turn 1 ½” at the top to the back, then stitch across the bottom of the fabric you folded over to create a casing.

Thread the dowel through the casing. Tie yarn through the holes to create a hanger.
*Optional* Use yarn to create tassels to hang at the sides of the banner.
Your Halloween Black Cat Banner is done! Hang that mischievous little guy up on your door for everyone to see!

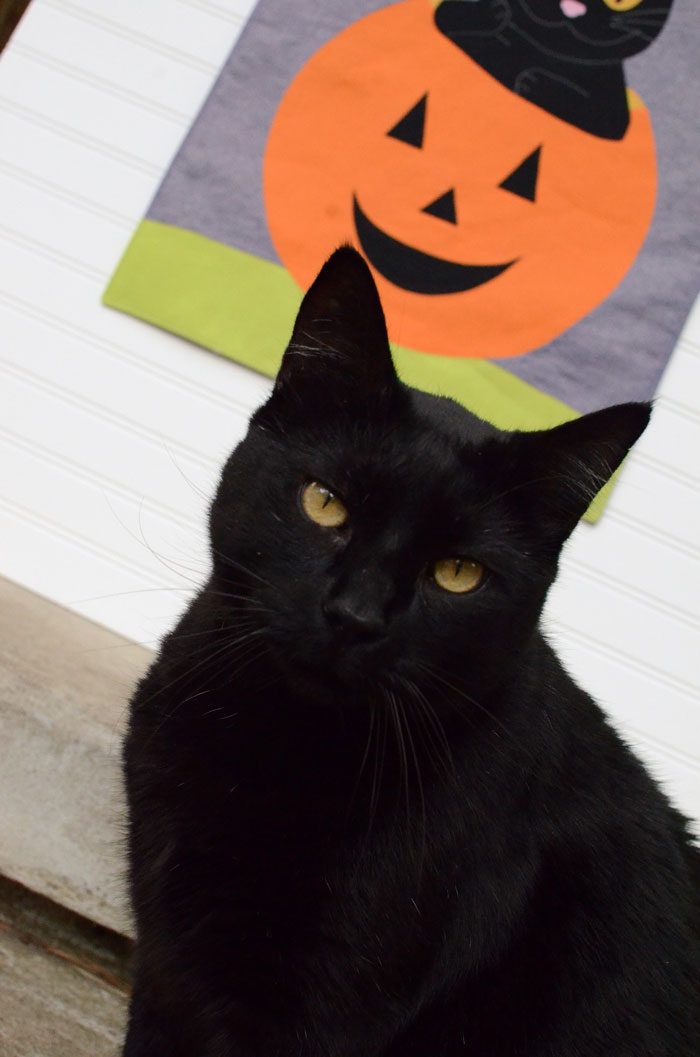
And look who came up to check on things while I was photographing my black cat banner! Such a sweet photobomber.

1 comment
Comments are closed.
Thank you! I love his "cattitude". I've been owned by a couple of black cats in the past, but my current cat is orange.